Nano Banana 2.1 Google's newest image model is live. Make pictures from text or edit with up to 14 photos.
Try itAI Art · November 29, 2024 · Updated August 26, 2026 · 21 min read · 51184 views
AI Image Prompts for Men: 10 Realistic Examples
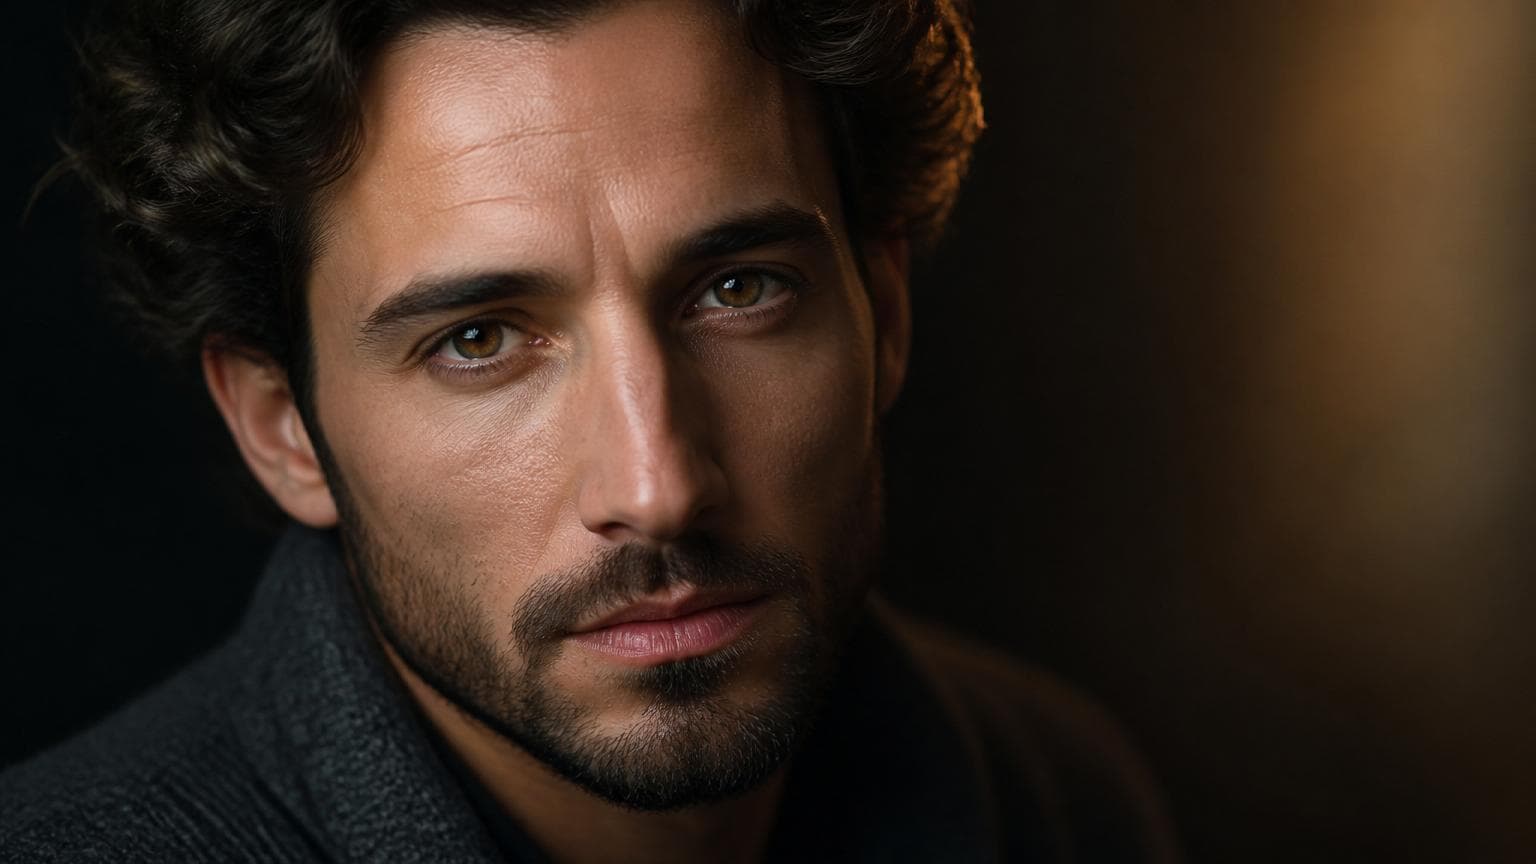
Ten realistic AI image prompts for men you can copy, plus the camera, lighting, and skin texture language behind them.
AI Image Generator
Type what you want to see and turn it into an image.
You generate a portrait of a man in a gray sweater, nice window light, good jawline, and for about half a second it works. Then something in your gut flags it as fake before your brain has even finished parsing why. The skin is too even. The eyebrows are near mirror images of each other. Both eyes carry the exact same reflection in the exact same spot at the exact same brightness. Nothing in the image is technically broken, and that is exactly the problem. It is too clean to be a photograph of an actual person standing in an actual room.
This is the single most common complaint about AI generated portraits of men, and it has almost nothing to do with resolution or model quality in the way people assume. You do not fix it by asking for "8k ultra detailed hyper realistic" for the tenth time. You fix it by understanding what is actually happening under the hood, and then writing prompts that work with that behavior instead of against it. That is what this guide covers: why faces specifically break this way, what a genuinely detailed prompt looks like next to a vague one, and the concrete language, camera terms, lighting terms, skin texture terms, that consistently pushes a generation from "obviously AI" toward "could pass for a real photo."
Why faces are the hardest part to get right
Every image model learns from an enormous pile of photographs, and a huge share of the portraits in that pile have already been retouched, filtered, or shot under flattering studio conditions before the model ever saw them. When a model is asked to draw "a man's face," it is drawing something close to the statistical average of everything it has seen, and an average face is, almost by definition, smoother and more symmetrical than any real face. Real skin has pores that catch light unevenly, faint discoloration, a slightly crooked nose, one eyebrow set a touch higher than the other. Average that across millions of photos and all of that individuality gets sanded down. What is left behind looks less like a person and more like the idea of a person, which is a decent description of what people mean when they say a face looks "waxy" or "plastic."
This is the same underlying failure that makes AI hands go wrong so often, just with a different symptom. A hand is a small, densely packed region of the frame with dozens of possible joint positions, and any single error there, a sixth finger, a joint bending the wrong way, is instantly obvious even to someone who has never studied anatomy. A face works the same way. It is a small region packed with an enormous amount of fine detail: individual eyelashes, the exact curve of a lip, the precise angle of light reflecting off a wet eye. Humans are also, for reasons that go back to basic survival and social cognition, extremely well practiced at reading faces. There is dedicated real estate in the human brain for recognizing and evaluating them, and that machinery does not switch off just because the face in front of you is generated. It notices the mismatch between two irises that are too perfectly identical, or a smile where both corners of the mouth lift by precisely the same amount, long before you can articulate what tipped you off. You are, in effect, judging the output with the most sensitive detector you own.
None of this means realistic portraits are impossible. It means the fix has to target the actual cause: an averaged, symmetrical default. The way around that is to describe specific, asymmetric, textured detail instead of asking for generic beauty, and to give the model real photographic constraints, a lens, a light source, a moment, rather than a pile of adjectives.
A vague prompt next to a specific one
Here is roughly what most people start with when they want a realistic man portrait:
"A realistic portrait of a handsome man, detailed face, professional photo, high resolution, high quality, sharp focus."
This prompt is not wrong, it is just empty. It tells the model what category of image you want without telling it anything concrete to render. There is no light source, no lens, no skin description, no expression beyond "handsome," which is a judgment, not a visual description. The model fills every one of those gaps with its default average, which is exactly the smoothed, symmetrical look you were trying to avoid.
Now compare it to something like this:
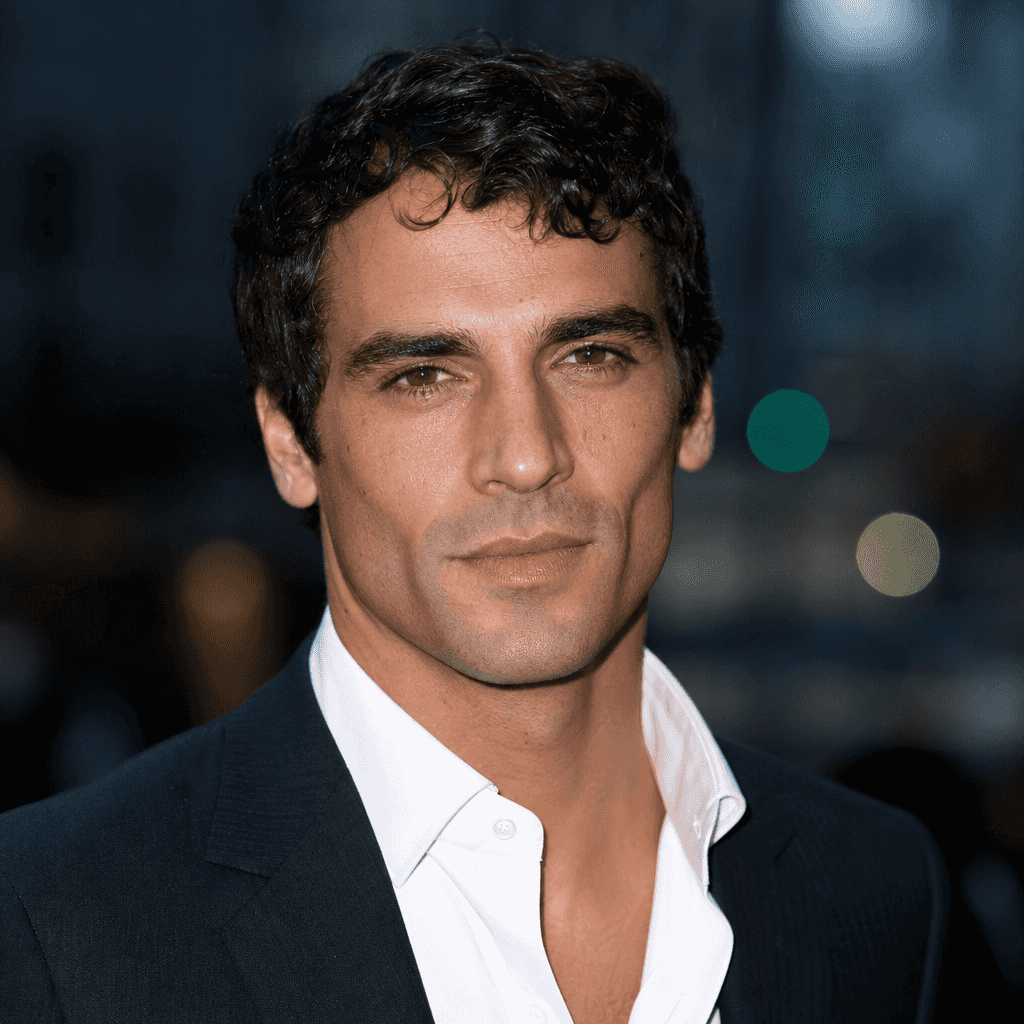
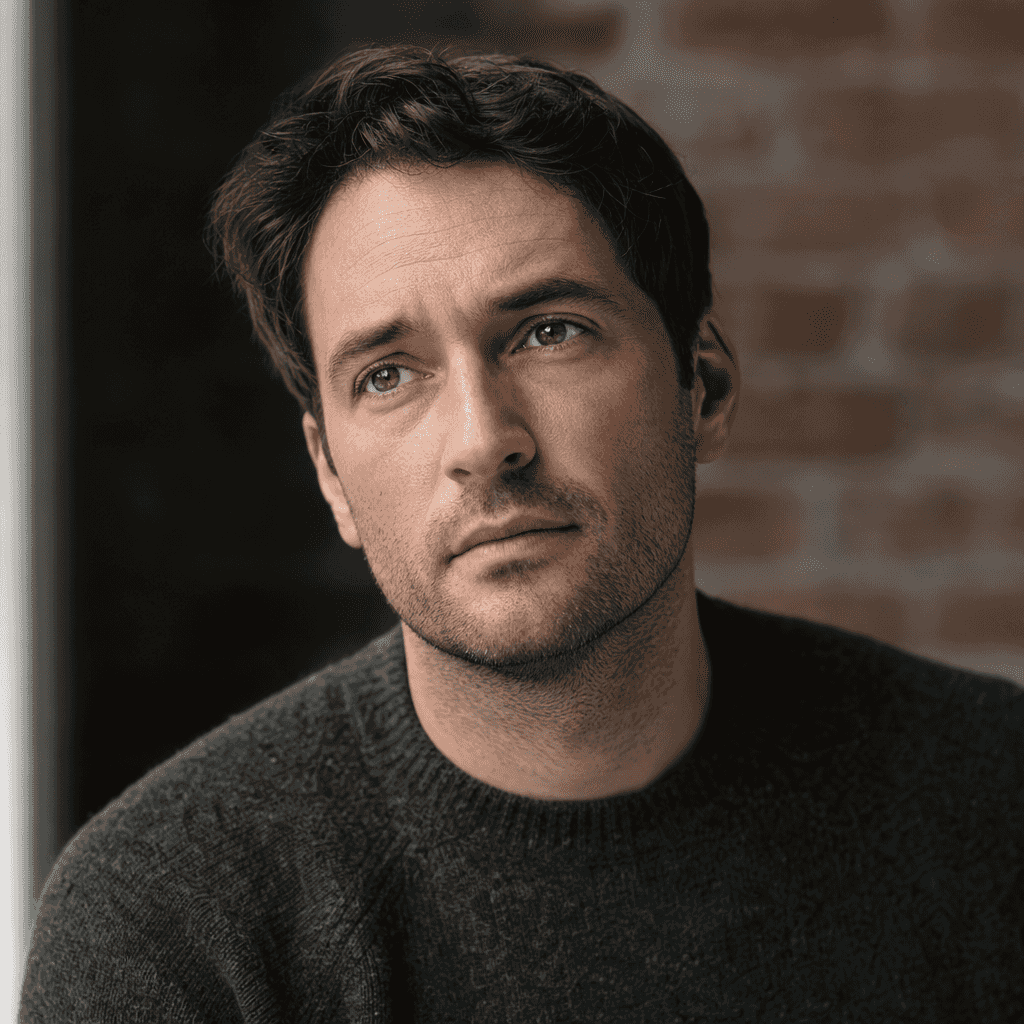
"Portrait of a man in his late thirties, shot on an 85mm lens at f/1.8, shallow depth of field. Soft window light falling from the left side of the frame, a single reflector filling the shadow on the right side of his face. Visible skin texture: fine pores across the nose and forehead, a faint sheen along the bridge of the nose, light stubble shadow along the jaw, one eyebrow slightly higher than the other. Natural asymmetry in the smile, mouth closed, a small crease at one side. Eyes looking slightly off camera, a single catchlight from the window visible in each eye. Charcoal wool sweater, out of focus brick wall in the background, natural color grading, no added grain."
Nothing in the second version asks for "realistic" directly, and yet it reads as far more real, because it describes exactly what a camera pointed at an actual person in an actual room would capture. A lens and aperture tell the model how the background should fall out of focus. A named light direction tells it where shadows fall and how the face is shaped by them. The skin description gives it specific texture to render instead of leaving that decision to the average. The asymmetry calls out the exact kind of detail that gets erased by default. This is the core technique behind every genuinely good realistic portrait prompt: replace abstract praise words with concrete, checkable, photographic facts.
Camera and lens language actually changes the output
Photography vocabulary is not decoration in a prompt, it is instruction. A model trained on captioned photographs has absorbed real associations between lens terms and how an image looks, so naming a lens changes the geometry of the result, not just the vibe.
An 85mm lens is the classic portrait focal length for a reason: it compresses the background slightly and renders a face with very little distortion, which is why it shows up constantly in prompts aimed at realistic headshots. A 50mm lens sits closer to how the human eye actually sees a scene, useful when you want a portrait that includes more of the body or setting without feeling like a close up crop. Pairing either with an aperture like f/1.8 or f/2.8 tells the model to blur the background into soft bokeh while keeping the face itself sharp, which is one of the fastest ways to make an image read as shot on a real camera rather than rendered from nothing. If you want more of the scene in focus, an aperture like f/8 keeps both the subject and background legible, which suits an environmental portrait where the setting matters.
It also helps to name the format. "Shot on a full frame mirrorless camera" or "medium format digital" both push toward a clean, high fidelity, professional studio look. "35mm film" or "documentary style photography" push toward something a little grittier and more candid. Either can look genuinely realistic, they just point at different kinds of realism, and naming one clearly is more useful than leaving the model to guess between them.
Lighting is doing more work than people give it credit for
If you only change one thing in a weak prompt, change the lighting description, because vague lighting is one of the biggest reasons a portrait ends up looking flat and artificial. "Good lighting" tells the model nothing. "Soft window light from camera left with a gentle falloff into shadow on the right side of the face" tells it exactly how to shape the face with light and shadow, which is most of what makes a portrait look dimensional instead of pasted on.
A few lighting setups worth knowing by name because they show up constantly in real portrait photography and translate well into prompts: Rembrandt lighting, a small triangle of light on the shadowed cheek, named for how it was used in classical painting and still a staple of studio headshots. Butterfly lighting, a light placed above and in front of the face that casts a small shadow directly under the nose, common in glamour and beauty photography. Three point lighting, a key light, a softer fill light, and a rim light separating the subject from the background, standard in studio setups. Golden hour, the warm, low angle sunlight near sunrise or sunset that flatters skin tones and adds long soft shadows. A softbox at a 45 degree angle from the camera is one of the most reliable phrases for a clean, professional, evenly lit studio portrait. Pick one of these and describe where the light is coming from relative to the camera, and the model has something concrete to build the face around instead of lighting it uniformly from nowhere, which is what produces that flat, shadowless, slightly artificial look.
Describe skin instead of praising it
This is where most prompts quietly sabotage themselves. Words like "stunning," "gorgeous," "flawless," and "perfect skin," stacked together, are exactly the phrasing that pushes a model back toward its smoothed, idealized default, because that is what those words are statistically associated with in the training data: retouched, filtered, magazine cover skin. If your goal is realism rather than a beauty ad, drop the intensifiers and describe skin the way a photographer or makeup artist would describe an actual face.
That means naming visible pores, especially across the nose and forehead where they show up most on real skin. It means allowing for a bit of natural oil sheen in those same areas rather than asking for a matte finish everywhere. It means mentioning small, ordinary imperfections: a faint scar, light acne scarring, sun spots, slightly uneven skin tone, a bit of redness around the nose, stubble shadow if the man is not clean shaven. None of these need to be dramatic. The point is that real skin is never perfectly uniform, and naming even one or two small deviations gives the model permission to stop defaulting to porcelain smoothness.
The same logic applies to the rest of the face. Real faces are not symmetrical, and saying so directly helps: one eyebrow slightly higher, ears that are not identical, a nose with a slight bend, a jawline that is a little stronger on one side. You are not making the man look worse by naming these things, you are describing what an actual human face looks like, which is the entire goal.
Let the eyes and expression carry one specific moment
Eyes are where a portrait either lands or falls apart, and they deserve their own line in the prompt rather than being an afterthought under "detailed face." The single most useful, specific piece of vocabulary here is the catchlight, the small bright reflection of a light source visible in the eye. Naming its source, "a single catchlight from the window visible in each eye," gives the model a concrete detail to place instead of generating a generic, uniform gleam that repeats identically in both eyes and reads as artificial.
Expression is worth the same treatment. "Happy" or "confident" are categories, not descriptions, and a model asked for a category tends to render the most average, symmetrical version of it: a closed lip smile lifting evenly on both sides, wide eyes, eyebrows raised the same amount. A real expression is rarely that balanced. Try describing a specific, momentary state instead: a tired half smile, one side of the mouth pulled slightly more than the other, eyes narrowed a little in genuine amusement, jaw relaxed rather than posed. Gaze direction matters too. Describing the eyes as looking slightly off camera rather than dead center into the lens breaks the mirrored symmetry that makes a face read as generated, and it tends to look more like a candid photograph than a passport picture.
Film grain versus a clean digital look, pick one
Analog references show up constantly in realistic prompts, and they can genuinely help, but they pull in a specific direction that is worth understanding rather than adding automatically. Phrases like "shot on 35mm film," "Kodak Portra 400," or "fine organic film grain" push toward warm, slightly imperfect skin tones and a texture that reads as unmistakably photographic, because grain is something a purely rendered image does not naturally have. That said, film grain and hyper detailed, pore level skin description are somewhat in tension: heavy grain obscures fine texture rather than revealing it, the same way it does in an actual photograph shot on film.
If your priority is showing off precise skin texture and sharp detail, lean toward "shot on a full frame digital camera" or "medium format digital, no grain, natural color" and let the skin description itself carry the realism. If you want a warmer, slightly nostalgic, editorial feeling and do not mind a softer overall texture, film language is the right call. Either works. What does not work is stacking both directions at once and hoping the model reconciles them, since that usually produces a muddled result that is not clearly one style or the other.
What still commonly goes wrong
Even with a well built prompt, a few things reliably slip through. Hands are still the most common casualty, if your man portrait includes hands doing anything more complex than resting flat, holding a phone, adjusting a collar, crossing arms, there is a real chance one of them comes out with an extra finger or an odd bend. That is a big enough topic on its own that it is worth reading through separately if it keeps happening to you.
Ears are the second most common issue, they are asymmetric in real life but AI models sometimes render one convincingly and leave the other slightly malformed or partially hidden by hair to avoid the problem entirely. Teeth can look uniform and slightly too white in a way that reads as fake, especially in a wide smile. Backgrounds with text, signage, or logos tend to come out garbled since text rendering is a separate weak point from face rendering. And symmetry has a way of creeping back in on a second or third generation of the same prompt, even one that specifically asked for asymmetry, simply because the model's underlying bias toward the average face is strong and a single instruction does not always override it completely.
The good news is that almost none of these require starting over. If one eye looks slightly off, or there is a stray earring you did not ask for, or a hand in the frame needs fixing without touching anything else you liked, that is exactly what a masked edit is for rather than a full regeneration. On Enhance AI, the image editor at /dashboard/image-edit includes a Change Region tool built for exactly this: you mask just the problem area, the odd eye, a blemish that reads as an artifact rather than a real skin detail, and regenerate only that region while the rest of the portrait stays untouched. If something needs to disappear entirely rather than be replaced, a stray object crossing the frame, an extra hand, an unwanted piece of jewelry, the Magic Eraser tool handles that. And for a broader change that is not about one small region, changing the lighting mood or swapping the wardrobe, the AI Edit tool takes a plain prompt describing the change. If hands specifically keep coming out wrong, there is a dedicated guide on fixing AI generated hands worth reading at /blogs/best-flux-1-prompts-for-hands. And if you are hitting generation failures or rejected prompts rather than just a bad detail, the troubleshooting guide at /blogs/flux-ai-troubleshooting-guide covers the more common causes.
Ten prompts you can adapt
Everything above turns into muscle memory faster when you start from working examples. Each of these follows the structure this guide teaches: subject with real detail, camera and lens, light with a direction, skin described honestly, one specific expression. Paste one in as written, then swap the details for your own subject.
1. Business headshot, natural light
A corporate headshot of a man in his early forties with short dark hair greying at the temples, light stubble, wearing a navy blazer over an open collar shirt, photographed near a large office window, soft daylight from the left, shallow depth of field on an 85mm lens at f/2, natural skin texture with visible pores, faint smile lines, direct confident gaze into the camera
2. Documentary street portrait
A candid portrait of a man in his sixties with a weathered face and deep laugh lines, grey beard, flat cap, leaning against a brick wall in morning light, shot on a 35mm lens, film grain, muted colors, catchlight from the open sky, eyes looking slightly past the camera as if mid conversation
3. Golden hour environmental portrait
A man in his late twenties with curly black hair and a denim jacket standing in a wheat field at golden hour, warm backlight rimming his hair and shoulders, lens flare kept subtle, 50mm lens at f/1.8, sun kissed skin with a light sheen, relaxed expression with the beginning of a smile
4. Studio portrait, hard light
A dramatic studio portrait of a bald man in his fifties with a strong jaw and a small scar above one eyebrow, single hard light source high and to the right, deep shadows across the left side of the face, dark grey background, 85mm lens, visible skin texture and stubble, serious unhurried gaze
5. Athlete in motion, frozen
A photo of a male runner in his thirties pausing after a sprint, hands on hips, breathing hard, sweat visible on his forehead and neck, overcast daylight, city park background out of focus, 70mm lens, realistic reddened skin from exertion, eyes closed for a second of rest
6. Craftsman at work
An environmental portrait of a carpenter in his forties with rolled up sleeves and sawdust on his forearms, standing at a workbench in a garage workshop, warm tungsten work light from above mixed with cool daylight from a doorway, 35mm lens, honest working hands in the frame, focused downward gaze at the wood he is marking
7. Rainy window portrait
A moody portrait of a young man in his twenties by a rain streaked window, cool blue daylight on one side of his face, warm interior lamp on the other, 50mm lens at f/1.4, sharp focus on the near eye, soft reflection of raindrops on his cheek, quiet thoughtful expression
8. Mature subject, honest detail
A close portrait of a man in his seventies with deep wrinkles, thin white hair, and pale blue eyes, seated by a bookshelf, soft window light from the front left, 85mm lens, every line of the face rendered honestly with no smoothing, faint knowing smile, hands folded in the lower frame
9. Night city portrait
A portrait of a man in his thirties with a beard and a wool overcoat on a city street at night, neon shop signs out of focus behind him in cyan and orange, light rain, 50mm lens at f/1.2, skin lit by the mixed neon glow, direct gaze, breath faintly visible in the cold air
10. Black and white character study
A black and white portrait of a boxer in his forties with a flattened nose and cauliflower ear, sitting on a locker room bench wrapped hands resting on his knees, single overhead light, deep blacks and bright highlights, 85mm lens, film grain, sweat and texture rendered honestly, tired eyes looking straight into the lens
A quick checklist before you generate
A few things worth confirming in your prompt before you hit generate, roughly in order of how much they tend to matter:
Have you named a lens and aperture, something like an 85mm lens at f/1.8, rather than leaving depth of field up to the model. Have you described where the light is coming from relative to the camera, not just that the lighting is good. Have you described actual skin texture, pores, a bit of sheen, a minor imperfection, instead of stacking words like flawless or stunning. Have you mentioned at least one asymmetric detail, an eyebrow, an ear, a slightly crooked feature, rather than implicitly asking for a symmetrical face. Have you given the eyes something specific, a catchlight source and a gaze direction, instead of leaving them generic. Have you described the expression as a specific momentary state rather than a broad category like happy or serious. And have you picked one direction, film texture or clean digital clarity, rather than asking for both at once.
FAQ
Why does my AI portrait look like a beauty filter even when I asked for realism?
Because "realistic" alone does not counteract the underlying bias in the training data toward retouched, symmetrical faces. The fix is not a stronger version of the same word, it is replacing vague praise with specific, asymmetric, textured detail: named skin texture, an uneven feature, a real light source. Realism comes from concrete description, not from repeating the word realistic.
Do I need to write an extremely long, complicated prompt every time?
Not extremely long, but specific. A prompt with a named lens, a lighting direction, one or two skin details, and a described expression will consistently outperform a much longer prompt made entirely of generic adjectives. Specificity matters more than length.
Why do the eyes still look slightly off even with a detailed prompt?
Eyes are one of the smallest, most detail dense regions in the entire image, and humans are unusually good at noticing anything off about them, an identical catchlight in both eyes, a gaze that is too perfectly centered, pupils that do not quite match in size. Naming a specific catchlight source and a slightly off center gaze direction helps, but eyes are also one of the easiest things to touch up afterward with a masked edit rather than trying to get perfect in one generation.
Should I always add film grain to make a portrait look more real?
Only if you want that specific look. Film grain and references like Kodak Portra push toward warm, slightly soft, nostalgic tones, which reads as photographic but works against very sharp, pore level skin detail. If your goal is crisp, high fidelity detail, a clean digital camera description without grain usually serves you better.
What if everything about the portrait works except one detail, like a bad hand or an odd blemish?
Do not regenerate the whole image and risk losing everything you liked. Mask just that region and regenerate it on its own using the Change Region tool in the image editor, or remove an unwanted object entirely with Magic Eraser. This is faster than starting over and it keeps the rest of the portrait exactly as it was.
Which model on Enhance AI should I use for a realistic man portrait?
Enhance AI's playground gives you more than 250 models to choose from, including the Flux family, Seedream, Qwen Image 2, Qwen Image 2 Pro, Nano Banana 2, and GPT Image 2 among others, and photorealism quality genuinely varies between them depending on the specific prompt. It is worth running the same detailed prompt across two or three models before settling on one, since the technique described in this guide, the lens, the lighting, the skin description, matters more than which single model you pick, but the right model for your particular prompt can still make a noticeable difference.
Realistic portraits are less about finding a secret prompt and more about giving the model the same information a photographer would think about before pressing the shutter: what lens, what light, what is actually going on with this particular face rather than faces in general. Start in the playground at /dashboard/playground with a prompt built around those specifics, and if one detail does not land, the image editor is there to fix exactly that piece without costing you the rest of the shot.

Written by Kushal
Kushal builds Enhance AI and writes the technical guides, from model merging and fine tuning workflows to prompting technique and how the platform's tools work under the hood. Every prompt in his articles is run on the platform before it is published, and the failure cases he writes about are ones he actually hit.
Related Articles
All Articles

Ready to Create with AI?
Transform your ideas into stunning visuals with Enhance AI. Image generation, video creation, upscaling, and more.